Stud-style models with Lune: the full meshlab guide
How the stud models in the showcase are made. Every model is a Luau script; Lune runs it, Blender renders it lit like Studio, and your AI looks at the picture and fixes the code. Starter kit included.
9 min read
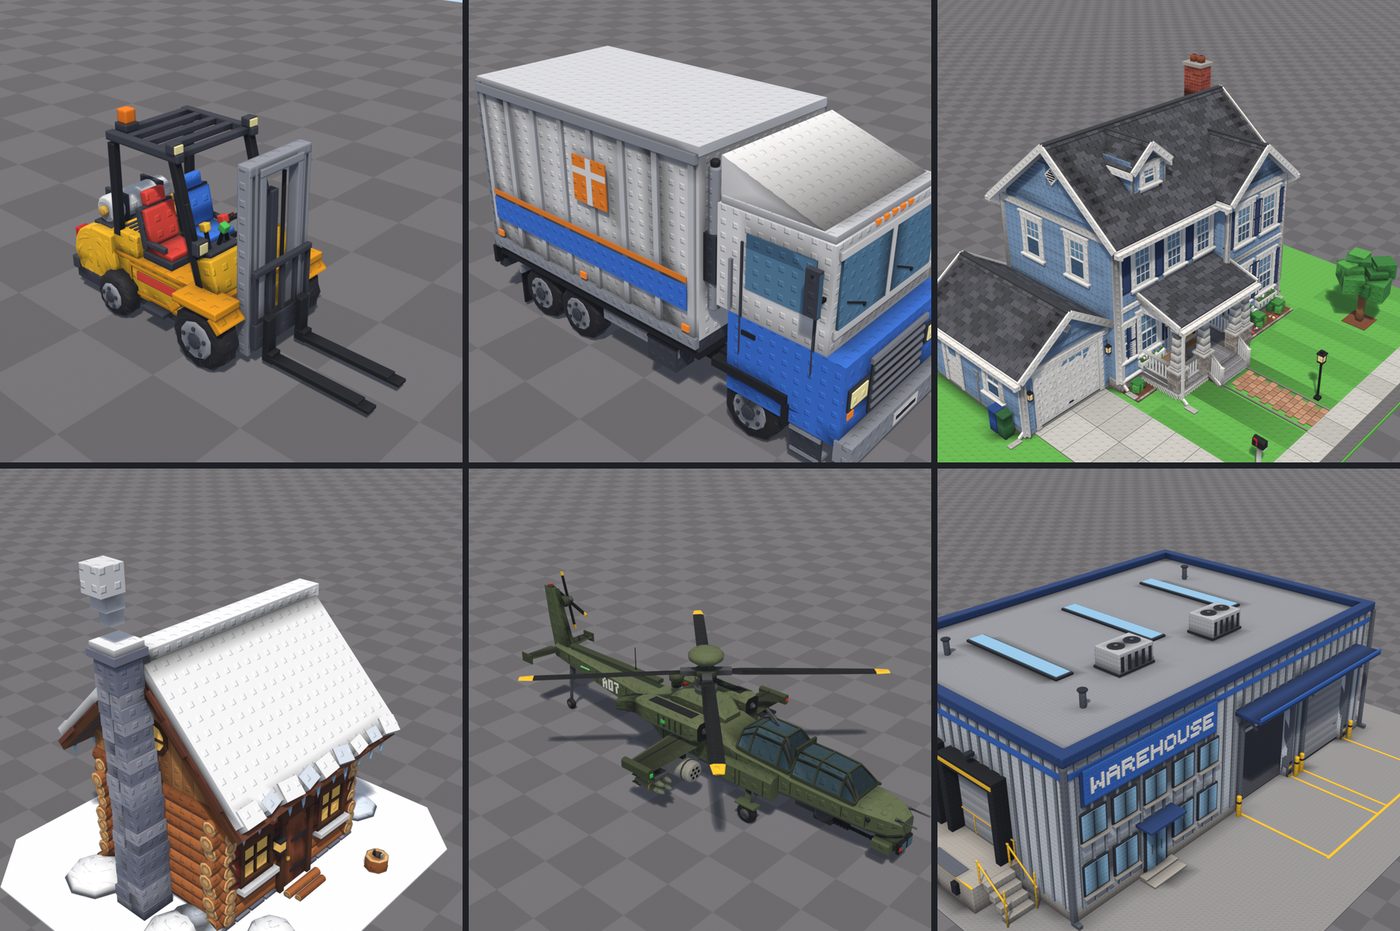
Every model in the showcase is a Luau script, not a sculpt and not an AI 3D generation. This guide is the whole method: the setup, the one trick that makes it look like a real stud pack, the loop that gets an AI agent to good results, and how the models get into Roblox. The toolkit used for all of it is a free download at the end.
Why write models as code
- An AI agent can't sculpt, but it writes code very well. Ask it for "a forklift" in Blender and you get blobs. Ask it for a forklift as a list of boxes, cylinders and swept shapes at exact positions, and it's in its element.
- Code is exact. Sizes are in studs, edges are where you said, and a model fits the rest of the game because every model is built against the same 5-stud character.
- Variants are free. Colours, sizes and random details are parameters, so one script makes a whole set (see variants).
- No AI-generator look. AI 3D models come back with melted shapes and smeared textures. Code-built models are crisp, flat-coloured and light on triangles, which is the stud look.
How the pieces fit
A model is one function that adds vertices and triangles to Roblox's EditableMesh. The trick is that the same function runs in two places:
- Outside Studio, under Lune. A small stand-in object with the same methods as
EditableMeshcollects the triangles and saves them as an.objfile. - Blender renders the
.objfrom the command line, lit the way Studio's default place is lit, with the stud texture on. The AI opens the picture, sees what's wrong and edits the code. Repeat. - In Roblox, the same model file runs on a real
EditableMesh, or gets baked and imported as normal meshes.
The agent never needs Studio open to model, and it can see every change in seconds.
Setup
You need Lune, Blender (4.x, reachable as blender from a terminal) and Python 3. Download the starter kit, unzip it so you have a meshlab/ folder, and from the folder that contains it run:
lune run meshlab/run Barrel
blender -b -P meshlab/render.py -- meshlab/out/Barrel.obj meshlab/out/Barrel.png hero 1.4
Open meshlab/out/Barrel.png. That's the whole loop.
Anatomy of a model
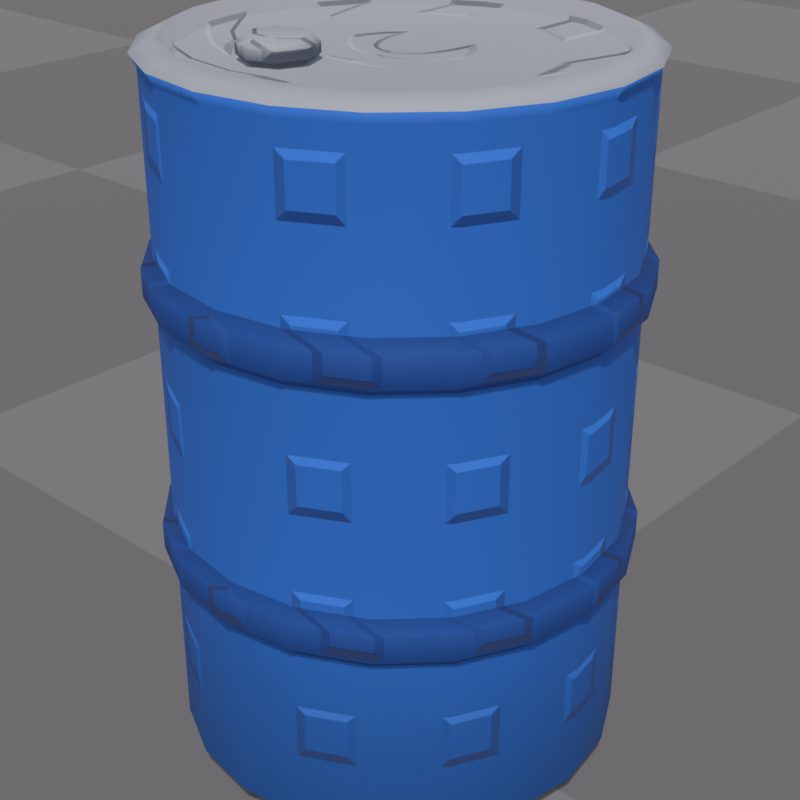
Here is the barrel. A lathe spins a side profile (radius, height pairs, bottom to top) around the vertical axis, and the colour function paints the two rolling hoops and the lid:
--!nocheck
-- Steel oil drum: blue body with two rolling hoops, darker lid rim, a bung cap on top.
return function(em, lib, Shapes)
	local CF, C3 = lib.CFrame, lib.Color3
	Shapes.beginBake()
	local S = Shapes.new(em, lib)
	local blue, hoop, lid = C3.fromRGB(46, 110, 200), C3.fromRGB(34, 80, 156), C3.fromRGB(150, 156, 168)
	local r = 1.0
	local prof = {
		{ 0, 0 }, { r - 0.1, 0 }, { r, 0.1 }, { r, 0.95 }, { r + 0.05, 1.0 }, { r + 0.05, 1.12 }, { r, 1.17 },
		{ r, 2.13 }, { r + 0.05, 2.18 }, { r + 0.05, 2.3 }, { r, 2.35 }, { r, 3.1 }, { r + 0.03, 3.15 }, { r - 0.08, 3.2 },
		{ r - 0.12, 3.12 }, { 0, 3.12 },
	}
	S:lathe(CF.new(), prof, 20, function(ring)
		if ring >= 13 then return lid end
		if (ring >= 4 and ring <= 6) or (ring >= 8 and ring <= 10) then return hoop end
		return blue
	end)
	Shapes.Props.cyl(S, CF.new(0.45, 3.12, 0.2), 0.16, 0.1, lid, 8)
	Shapes.finishBake(lib)
end
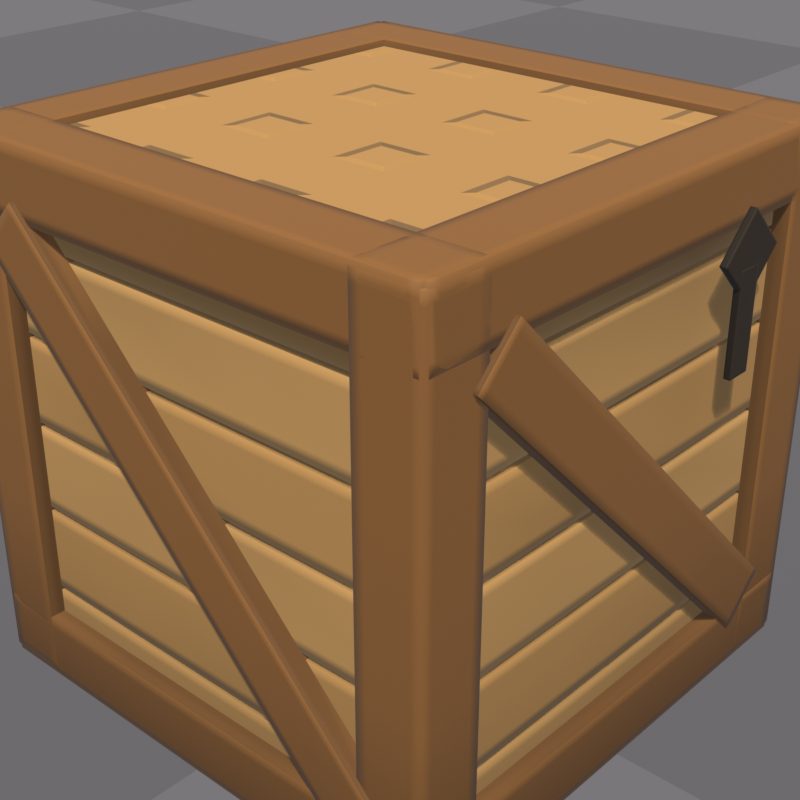
The crate is the other basic pattern: boxes. Planks in two alternating shades, a darker frame on all twelve edges standing slightly proud, a diagonal brace on each side and a stencilled arrow. Each piece is one bevelBox(position, size, colour, bevel) call:
Every model follows the same shape:
return function(em, lib, Shapes, part)
	local V3, CF, C3 = lib.Vector3, lib.CFrame, lib.Color3
	Shapes.beginBake()                  -- start the ambient-occlusion bake
	local S = Shapes.new(em, lib)       -- the main mesh
	-- boxes, lathes, tubes and lofts go here, in studs
	Shapes.finishBake(lib)              -- soft contact shadows baked into vertex colours
end
Units are studs, the front of the model faces -Z, and the ground is Y = 0. The toolkit has boxes (box, bevelBox), spun shapes (lathe), swept cross-sections (loft), smooth tubes along a path (tube) and small helpers for cylinders, pallets and cartons. Most models are 90 percent boxes.
The secret: studs are a texture, not geometry
This is the part people get wrong. The studs on a real stud-style asset pack are not little cylinders modelled on every surface. They are a normal map: a small tiling image that tells the lighting "there's a raised square here" so every flat face catches light like it has studs, with zero extra triangles.
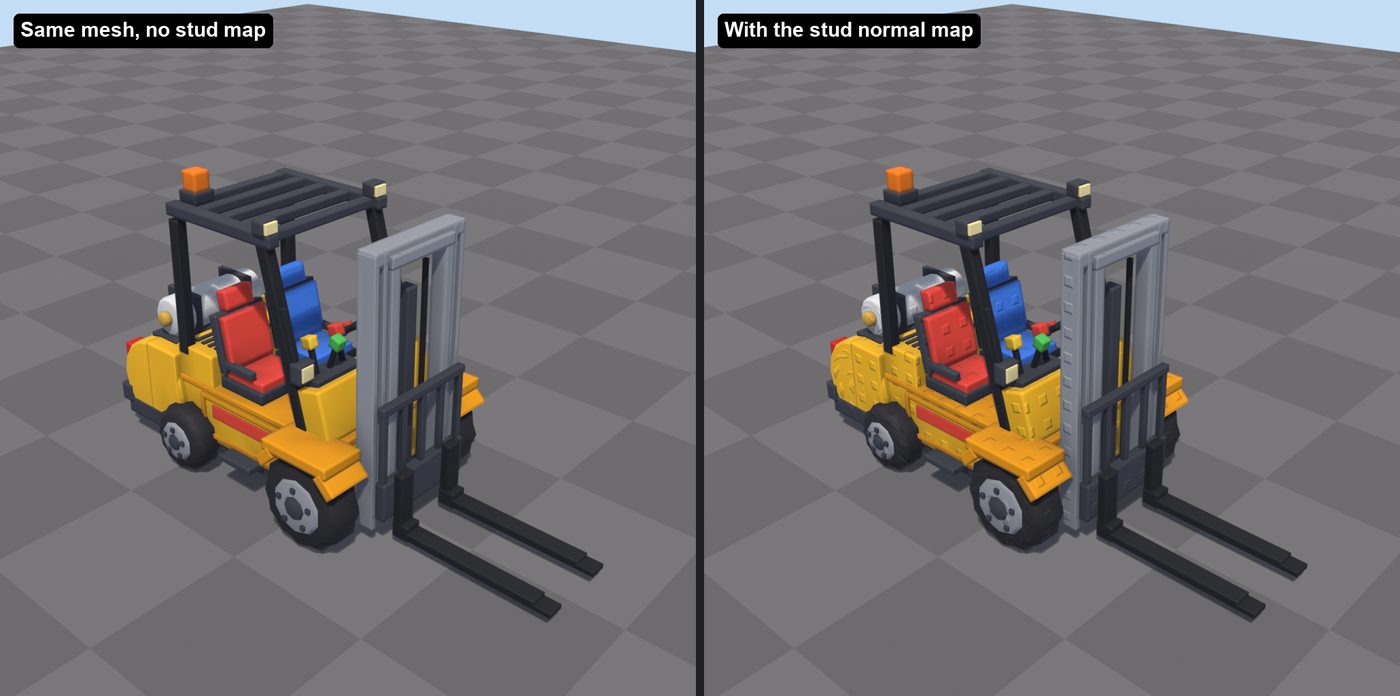
Two things make it work:
- Every face gets UVs measured in stud cells. One UV unit is one stud cell (0.6 studs in the kit), so the stud grid is the same size on a tiny button and a whole wall. The toolkit does this for you on every shape.
- One tiling stud normal map (
textures/stud_normal.png, a square stud with a bevelled rim, about 42 percent of a cell) goes on the surface. In Roblox it goes on aSurfaceAppearanceor a MaterialVariant.
Modelling real studs instead gives you lumpy LEGO-looking models with ten times the triangles. Don't.
The look and fix loop
The quality comes from the loop, not from the first draft. The rule for the agent is simple: render, open the image, fix, render again, and never report a model as done from the code alone.
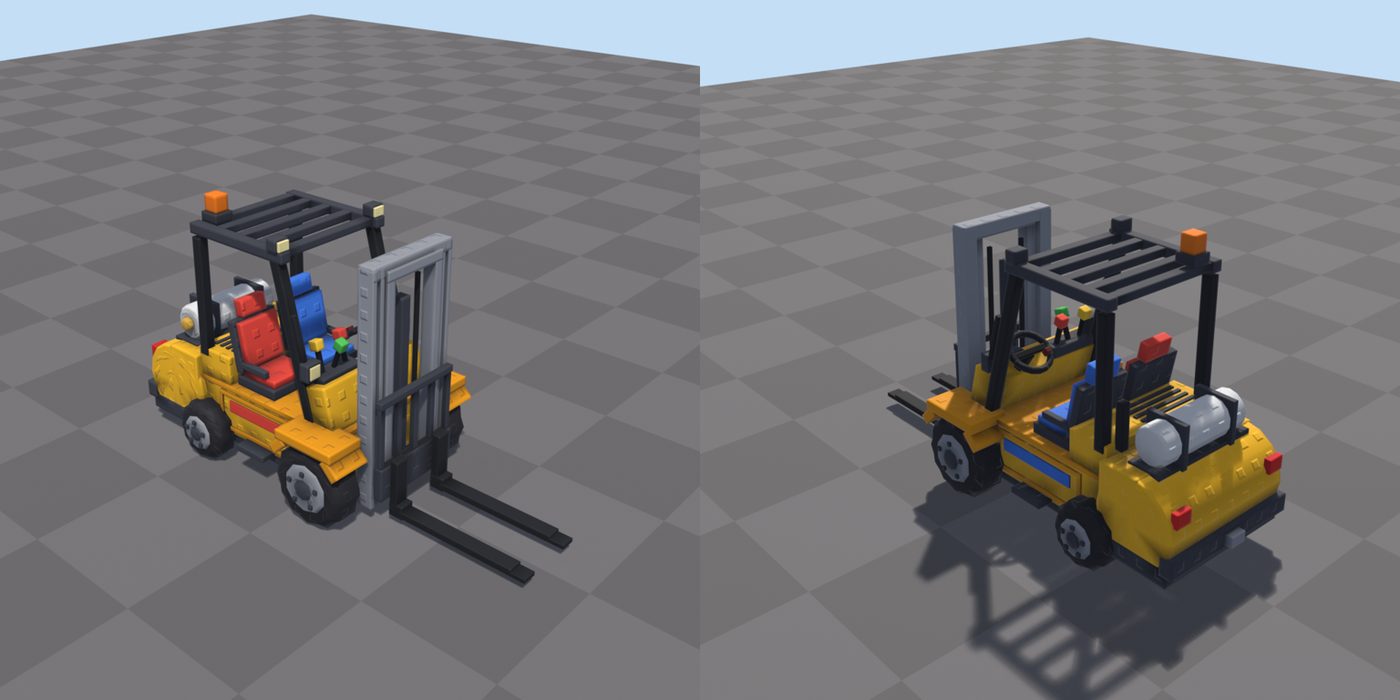
What to check on every render:
- Pieces floating off the body or sinking into it.
- Wrong way round (the front is -Z; text on the front reads mirrored if the X axis is flipped).
- Holes: the renderer culls back faces, so a triangle wound the wrong way shows as a hole.
- Too dark: the occlusion bake is capped because Roblox's own lighting already shades sides, but check anyway.
- Proportions against a 5-stud character, and from the hero, front, side and rear views, not just one.
For a batch of models, have the agent put every render on one labelled contact sheet so you can judge the set at a glance.
What makes them look good
These rules came from real feedback, each one after something looked wrong:
- Crisp edges by default. Soft bevels on everything makes every object look like the same rounded plastic. Bevel only round, organic or hero pieces.
- Flat, bright, saturated colours. Two or three shades per material, no gradients, no noise.
- Real detail, from real references. The forklift was reworked from photos of real forklifts: the counterweight, the mast, the overhead guard, the hydraulic lines. A few true details beat lots of random ones.
- No "AI look". No random glowing strips, no floating spheres, no greebles that mean nothing.
- Measure, don't eyeball. When matching a reference, measure its proportions first, then build.
- Lit like Studio. The preview renderer copies Studio's default lighting (one warm sun, flat grey-blue fill, no filmic colour curve), so what looks right in the preview looks right in the game.
Big models: split into parts
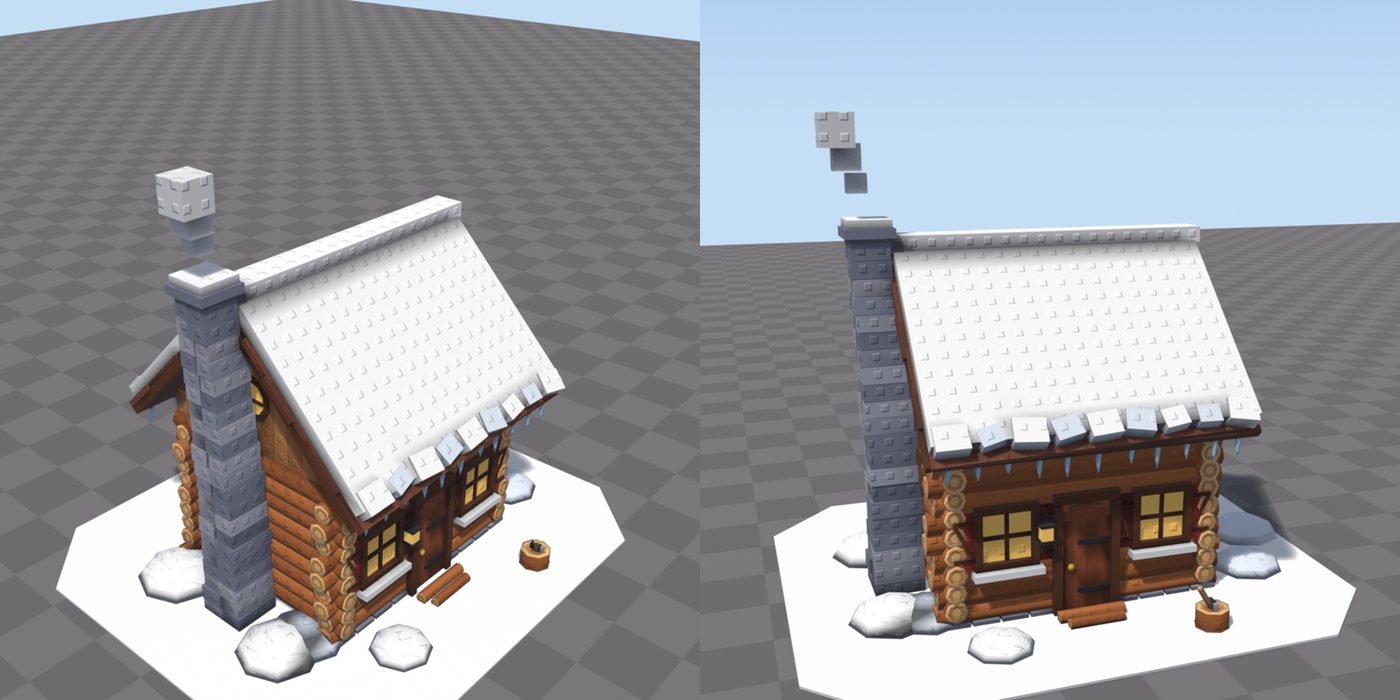
One EditableMesh holds at most 20,000 triangles and 60,000 vertices, and anything that moves (wheels, forks, doors) has to be its own piece anyway. part("Name") gives the model a separate mesh; each becomes its own MeshPart in Roblox. The house is five of them:
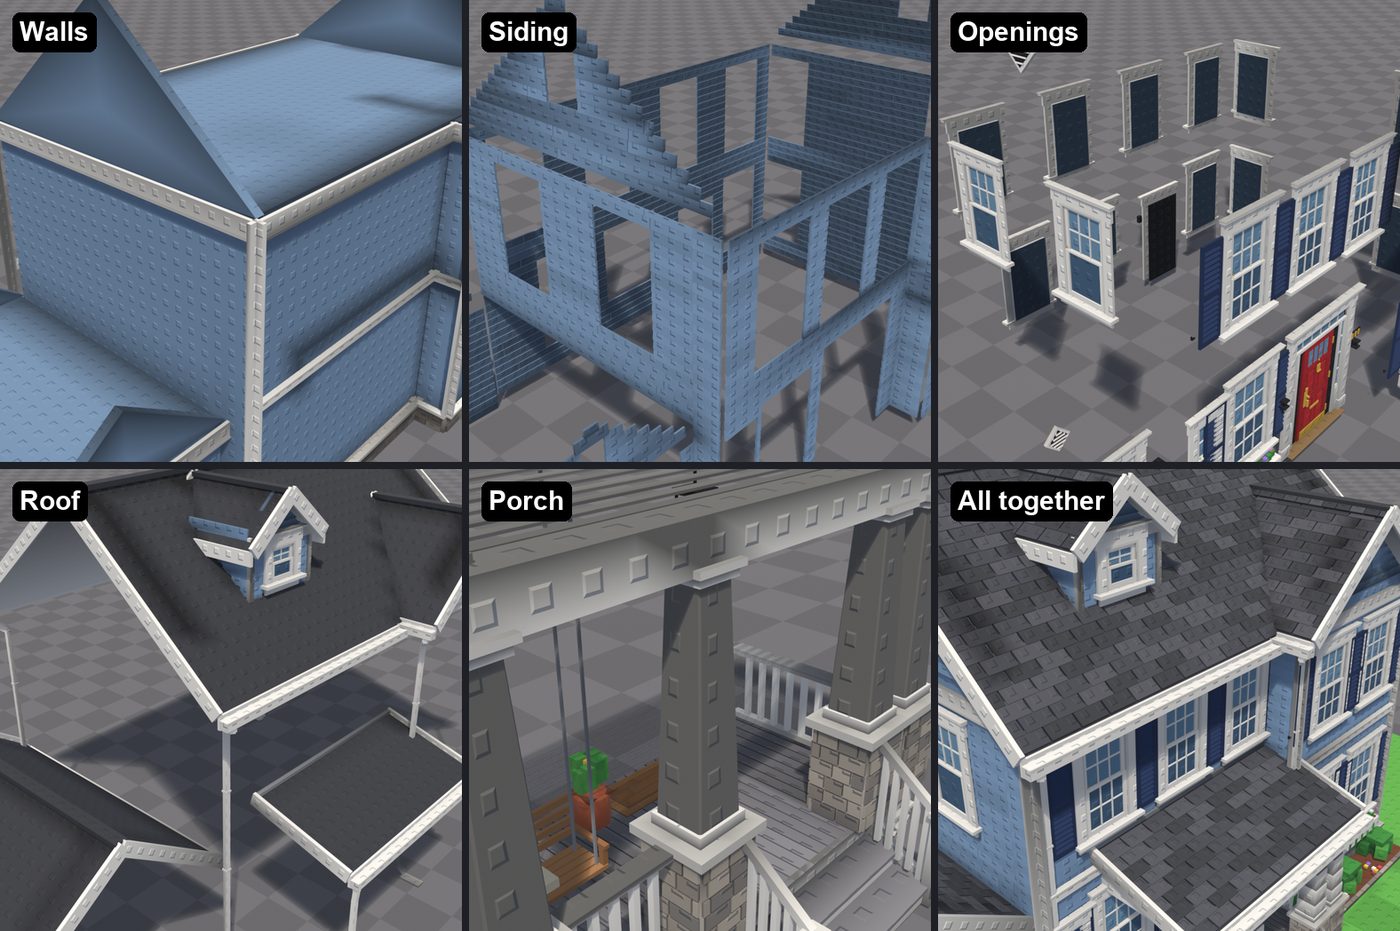
Write down each moving part's pivot (where the hinge or axle is, in model space) in the comment at the top of the file, so the game code can rotate it.
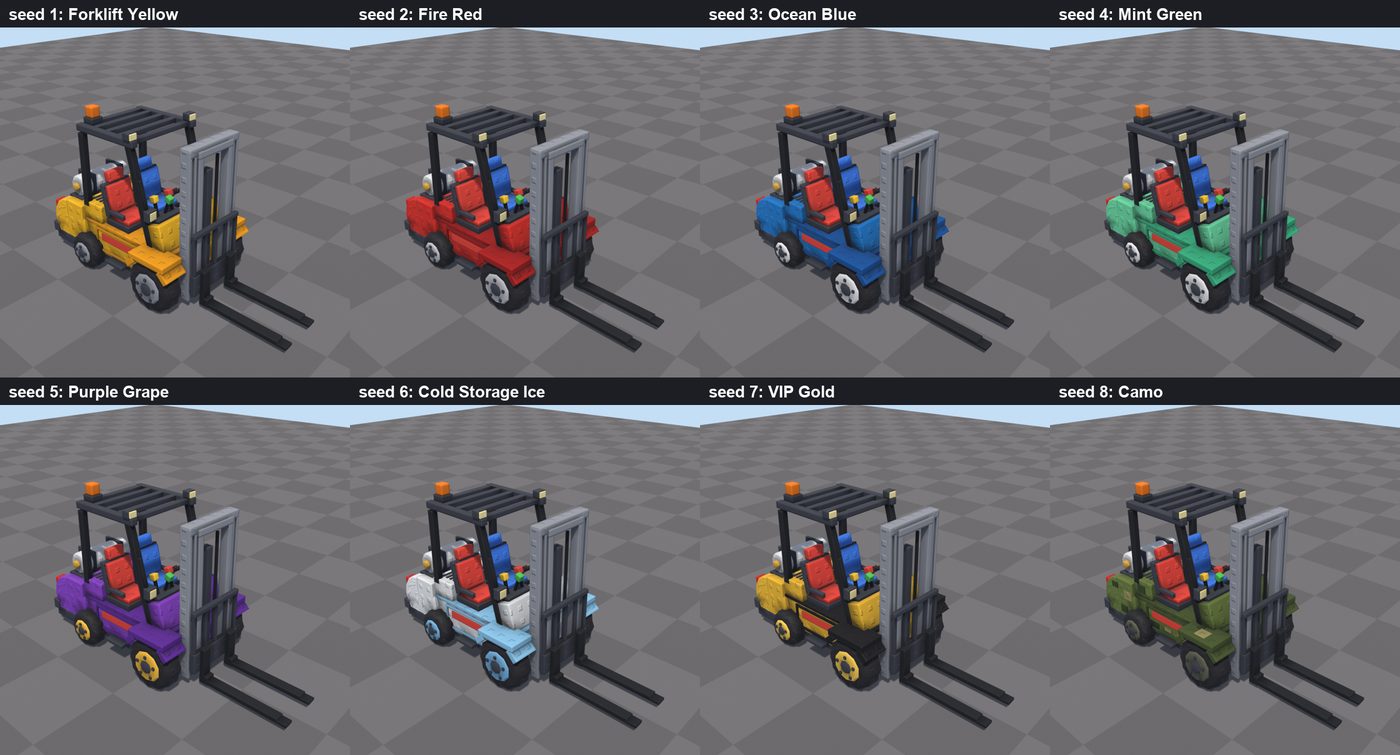
Variants from one script
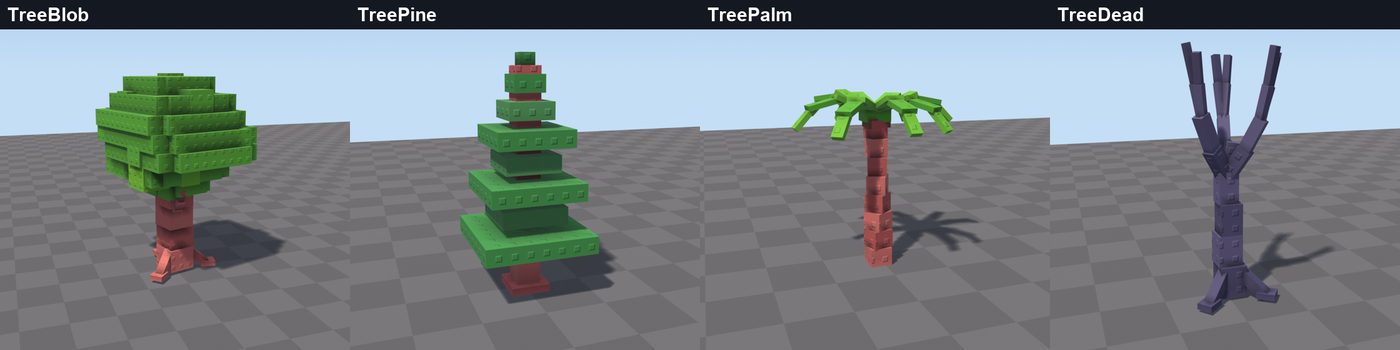
Because colours and sizes are just variables, one model makes a whole set. Paint jobs are a loop over a palette; random details use a seed, so lune run meshlab/run TreeBlob 3 always gives the same tree number 3.
Things that glow
Lamps, screens and lit windows shouldn't get the baked shadows. Draw them after Shapes.finishBake into their own part("Glow"), then give that part a Neon material in Roblox.
Getting it into Roblox
There are three routes, depending on how many models the game has:
- A few models, live.
StudioBuild.luauruns the model file on realEditableMeshobjects and returns a Model with one MeshPart per part. Good for testing and a handful of props. - Baked data.
tools/bake_meshdataturns every model into data modules, andMeshDataLoader.luaurebuilds them in game without running the modelling code. EditableMesh content made on the server doesn't reach players, so clients build their own copies. Players have a small EditableMesh memory budget, so keep it to modest amounts. - Real uploaded meshes (best for a whole game).
tools/export_partswrites one OBJ per part andtools/pack_glb.pypacks them into one GLB. Import that in Studio (File, Import 3D, scale unit Stud, merge meshes off) and every part uploads as a normal MeshPart with its colours and UVs. Then add the studSurfaceAppearance.
Two settings to know: published games using EditableMesh need Game Settings, Security, Allow Mesh & Image APIs on, and a glTF import comes in turned 180 degrees around Y, so rotate placed parts back.
Gotchas
CFrame.lookAtis wrong in Lune 0.10.5 for any direction with a Z component. Use the kit'sProps.lookAt.- Spun shapes shear the stud grid if their UVs run continuously round the shape; give each rib its own UV island (the
islandColsoption). - Detail boxes sunk into a face can make that face's occlusion go black; keep detail on the surface.
- Triangle limits are per part; the runner prints a warning when a part goes over.
- Creatures and characters with smooth organic bodies need a different tool (a signed-distance sculpt that blends shapes into one skin); boxes and lathes are for props, vehicles, buildings and scenery.
Paste this into your agent
Read meshlab/BRIEF.md, meshlab/Shapes.luau, meshlab/Props.luau and the example models in meshlab/models/ (Barrel, Crate, Cabin, Forklift).
Then model [the object] as meshlab/models/[Name].luau in the same style.

- Units are studs, front faces -Z, ground is Y = 0. Size it against a 5-stud Roblox character.
- Crisp edges (bevel 0) unless a piece is round or a hero detail. Flat, bright, saturated colours.
- Build real details from what [the object] actually looks like; no random glowing strips or floating spheres.
- Anything that moves is its own part("Name"); note its pivot in the file's top comment.
- Loop until it's right: lune run meshlab/run [Name], then
  blender -b -P meshlab/render.py -- meshlab/out/[Name].obj meshlab/out/[Name].png hero 1.4
  Open every render yourself and fix what's wrong. Check the front, side and rear views too.
- When done, show me the hero render and tell me the triangle count per part.
Download the starter kit
Download the meshlab starter kit (about 50 KB): the EditableMesh stand-in, the shape toolkit with stud UVs and the occlusion bake, the Studio-lit Blender renderer, the stud normal map, the Studio loaders, the bake and export tools, eight example models from a cone up to a forklift with moving parts, and BRIEF.md to hand your agent. MIT licensed, so use and change it in your own games. It is also on GitHub, alongside all the skills, at zriptic/roclicks-skills.